Monday, March 30, 2015


Pocket Letter
Add-ons Tutorial


SUPPLIES:
Scapbook papers in various sizes and colors
Corrugated Cardboard
Edging Scissors or Edge punch
Washi tape or other decorative tape
Small images or other focal point for the piece
Pop up dots or mounting tape
Sayings or Words you wish to use
Glue stick, scissors etc.
Basically have your stash out!! :)
 

STEPS:
First cut your scrapbook paper to the size pocket size.
You can also make small versions of this to place inside pockets too!
I use the edge distresser to rough up the edges.

Next I cut smaller pieces of scrapbook paper the coordinates with
the image I am using.  I either cut with edging scissors or distress
it as well.   Also I add the washi tape to put a little bling to the piece.

 
I place the smaller paper on with a pop dot or mounting tape.
 
I add the corrugated cardboard....where I like it, either
with glue stick or pop dot.
I create the saying or word sign and add it to the cardboard area.
I add the small image to be used for the piece.
 
 
I add some small decorative dots (ladybugs) or you can use glitter,
Pearl paints, stickles etc. for some more bling. Also flowers,
ribbon, or whatever you have in your stash! 
 
There you have it...you can put this in a pocket...the 3-D is not
so high that it wont fit into a pocket...you just have to ease it in a bit.
 
This is a Beatrix Potter Pocket Letter I am doing for a swap
that contains some of the add-ons:
 
 
Happy Creating!!! Please post what you create on the Pocket Letter
group on Facebook, I would love to see your versions!!


Wednesday, March 25, 2015


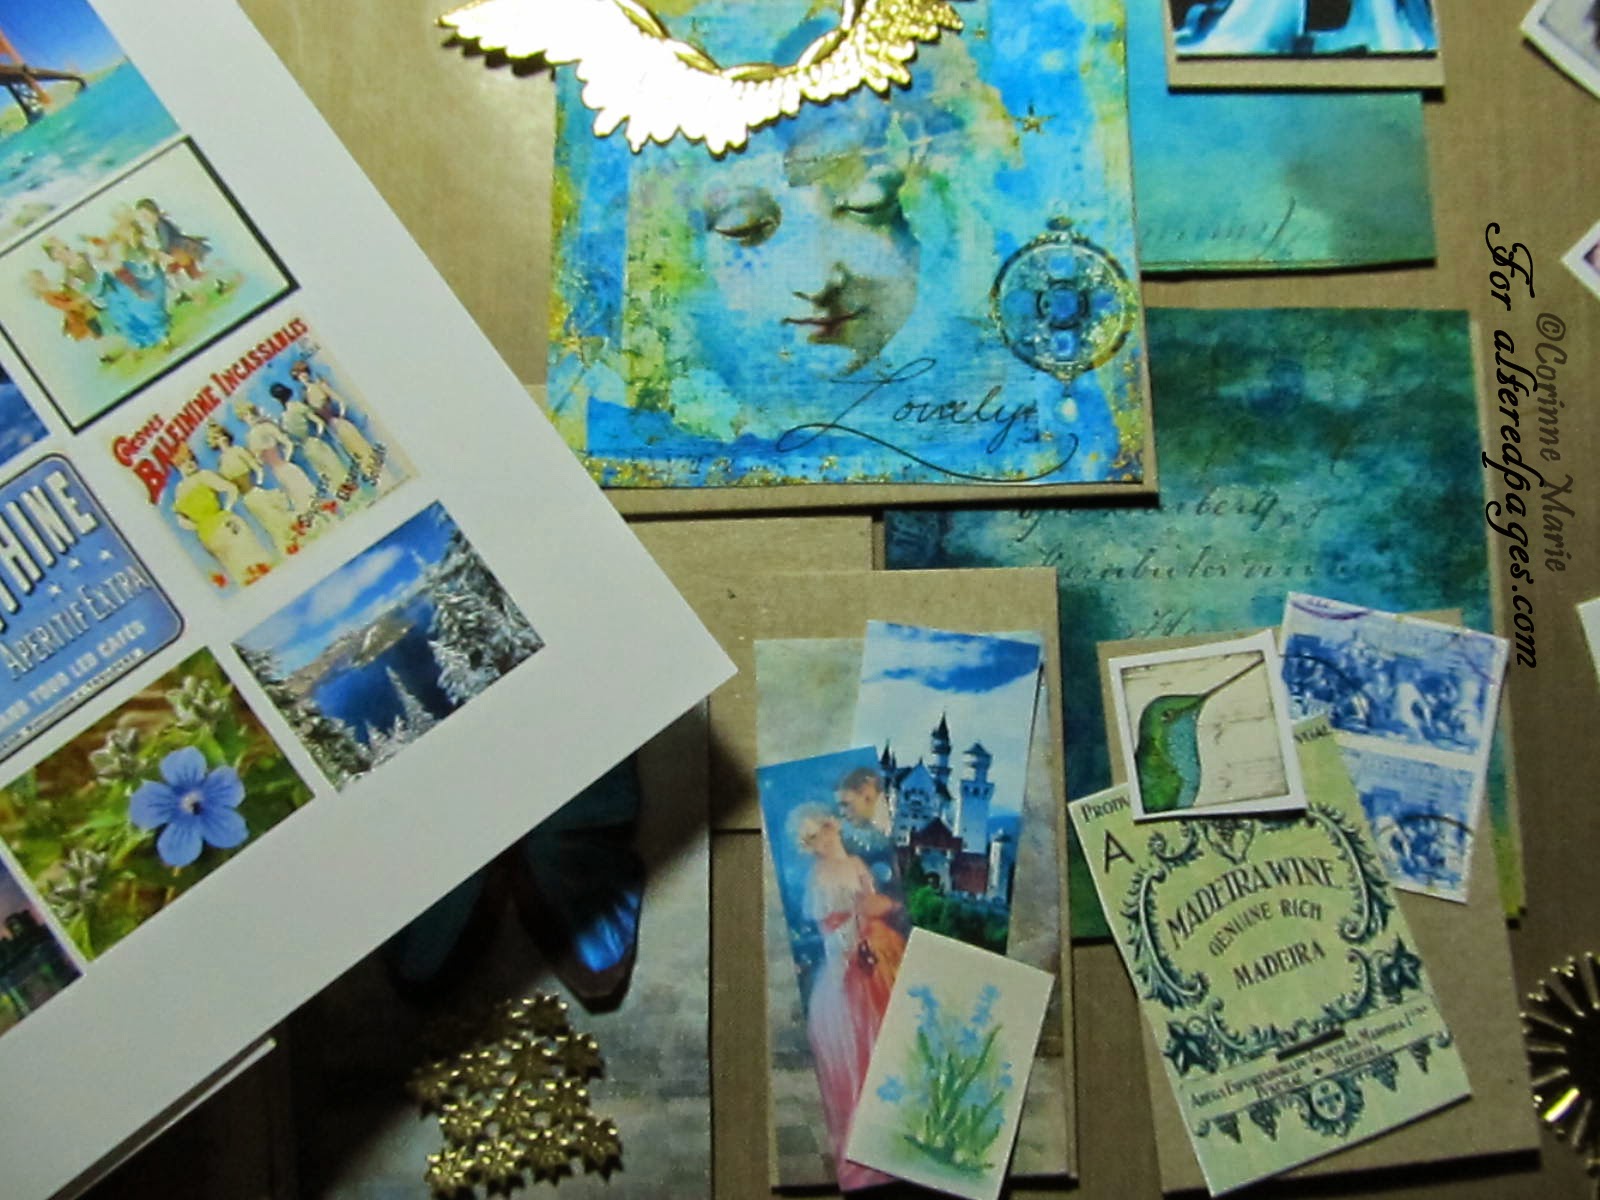
Collage in Blue
 
 
One of my very favorite things to do is collage. I love paper and images.
And Altered Pages has lots to chose from when it come to images!
I especially love the color groupings they have. 
For this collage I used pieces of chipboard that I have around,
and decided on BLUE as its is one of my favorite colors.
And included lots of German Scrap for some bling!
 
The first step is to gather all the materials you will need.
I like having it all around me, so I can have lots to pick from.
I begin by doing the smaller collages on smaller pieces of
chipboard.  (Around an ATC size)  I had already selected
the larger piece in the middle.  This is one of my own
digital collages. (yes I love digital collage too) 
So I started to construct the full piece with the digital
collage in the middle. There are three larger pieces
underneath as the foundation that holds the rest of the
collage.   These pieces have just a general background color.

Now you start to layer your collage with images that speak to you!
I try placing the images around, and keep doing it until I like it.
I also go around the final collage with ink...to finish it off.
I finally add the German Scrap and its complete!
And if you feel overwhelmed at the size....start SMALL.
The example above is the size of an ATC.
(it includes an inchie for texture!)
 
Keep going and keep trying different combinations of images to achieve
the look you like. Once you have all the individual pieces you can glue
them to the three foundation chipboards.
 
I hope you give this a try!! And once again please
come visit Facebook AlteredPages Artsociates page and
show us your creations!!
 
SUPPLIES:
Collage sheets:
Chipboard or some firm foundation material
Scrapbook papers for backgrounds
(that matches your color scheme)
and Glue sticks
Ink pads
 
 
A few more examples:


Wednesday, March 11, 2015


Small Shrines and Dioramas


Supplies Needed:
Small Jewelry Boxes or Tins
(approx. size is 2.5x3.5 inches)
Collage Sheets:
and glue sticks
Double stick mount tape (squares)
Scissors, Ruler, Pencil, Glitter etc.
 
HOW TO:
 
Small Green Girl
 

I fussy cut the girl out, and wrapped the box in
lime green tissue paper. To give the girl some
depth I added a couple of squares of mount to
her back.  I then added the German Scrap to
give the feel of a garden setting.
A few small things like butterflies and flowers
make this a nice home for her. She is at home
in her garden or on her way to a St. Patrick's party!
 
Fairy with Flower


This fairy is particularly sweet. She is delicate and
really need a soft and cozy place to reside.  I
wrapped the box in printed tissue paper, and
printed two (2) images of her.  I cut the first image
to the size of the box, and fussy cut the second copy
of just the fairy.  I added the mount tape and placed
it directly on top the first copy of the fairy, this adds
dimension and give a bit of a shadow.  I put glitter
on her wings and her flower.  I placed a large
German Scrap  medallion on the back side to give
a regal feel to her home. 
 
 
Woodland Fairy  


I once again printed two images of this fairy, fussy cutting one
of them.  I covered the box in tissue
paper, and added some moss to the bottom and placed the
butterflies on it.  I placed a band of German Scrap  to the
top making an round shape that lets light in and highlights
the fairy and her butterflies.
 

I hope everyone gives this small shrines a try!
Please come visit the AlteredPages Artsociates page
on Facebook and show us your pretty creations! And please
remember to check out the Mail Box Muse kits!!

Corinne Marie


Tuesday, March 3, 2015


Altered Pages Design Team Member!   
 
 
Happy and excited to become a new design team member


Looking forward to many a fun creation.
Special thanks to Jean and Lyneen!!
You ROCK girls!